Setting up your Groq API key
Connect Groq to Whiskers for fast, low-cost transcription. Five-minute setup.
Whiskers uses Groq for fast, low-cost transcription. To plug it in, you'll create a Groq account, add billing, set a spend limit, and generate an API key. The whole thing takes about five minutes.
You'll need:
- An email address (or Google / GitHub account)
- A credit or debit card
- About 5 minutes
Step 1 — Go to groq.com
Open groq.com in your browser and click Start Building in the top-right corner.

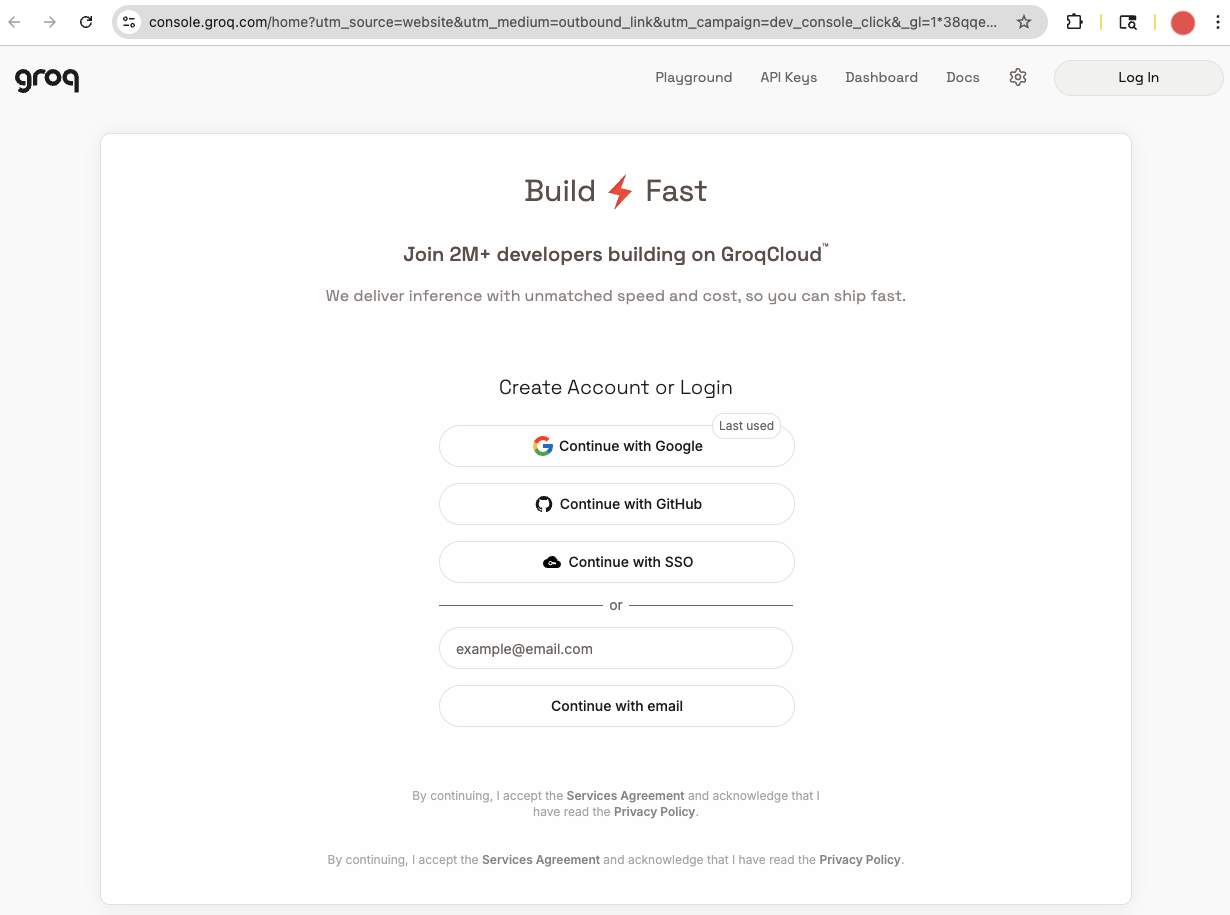
Step 2 — Sign up or log in
You'll land on the Groq Console login page. Pick whichever option you prefer — Continue with Google is generally the fastest.
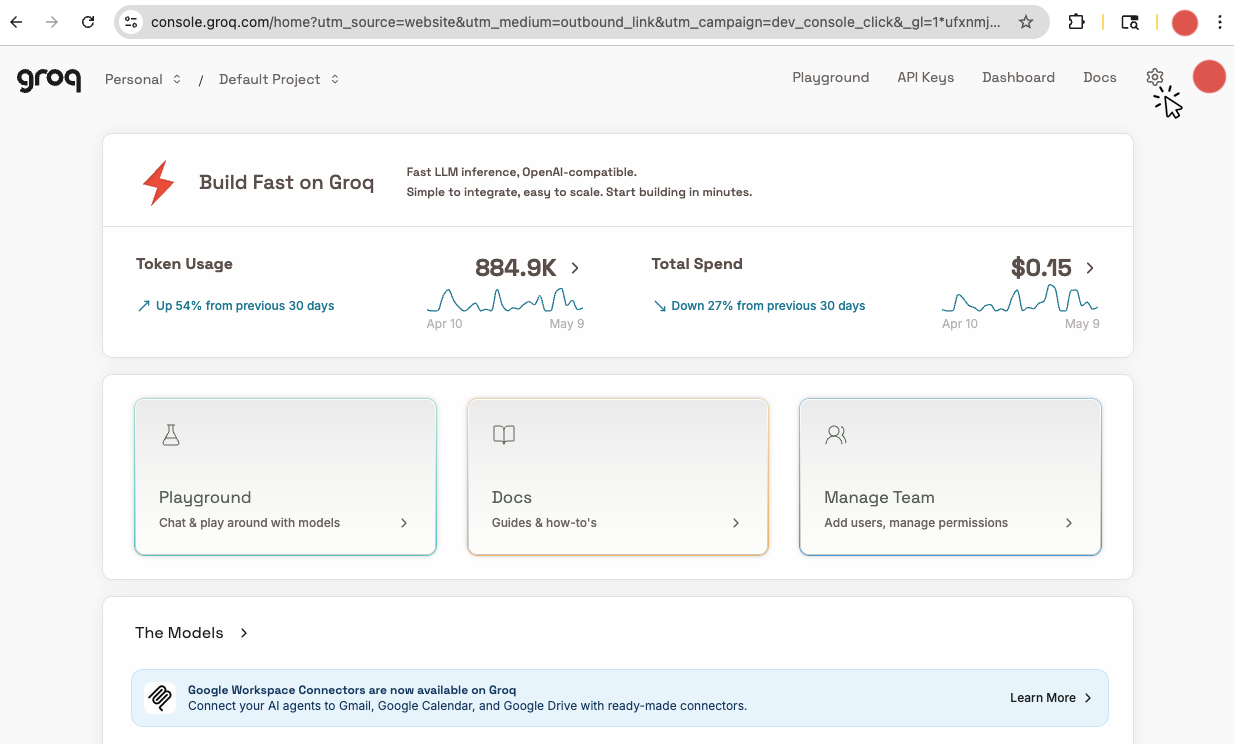
Step 3 — Open Settings
Once you're signed in, you'll see your console dashboard. Click the Settings gear icon in the top-right of the page.
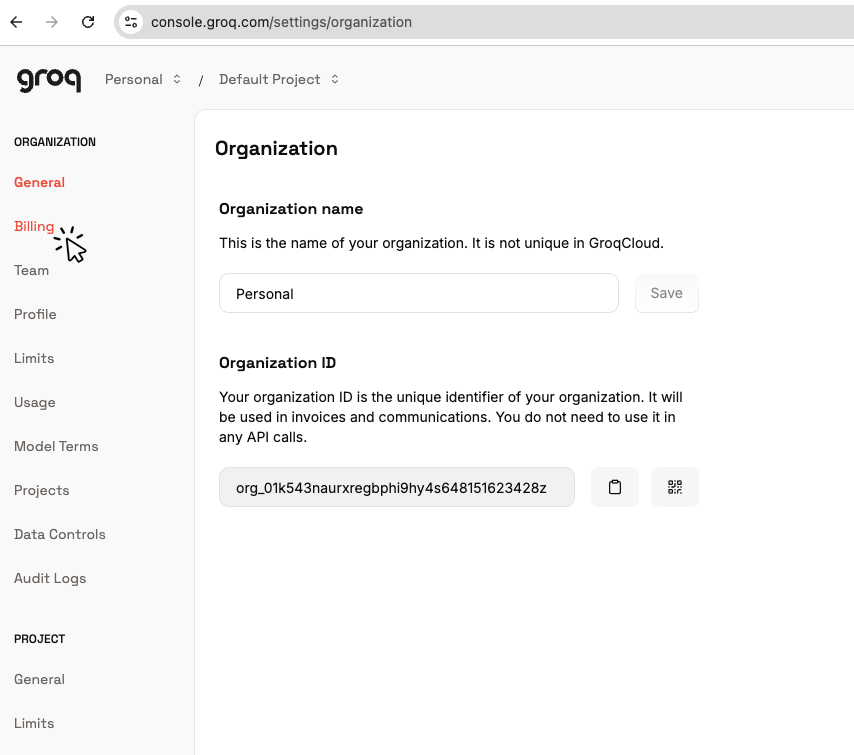
Step 4 — Go to Billing
In the Settings sidebar on the left, click Billing.
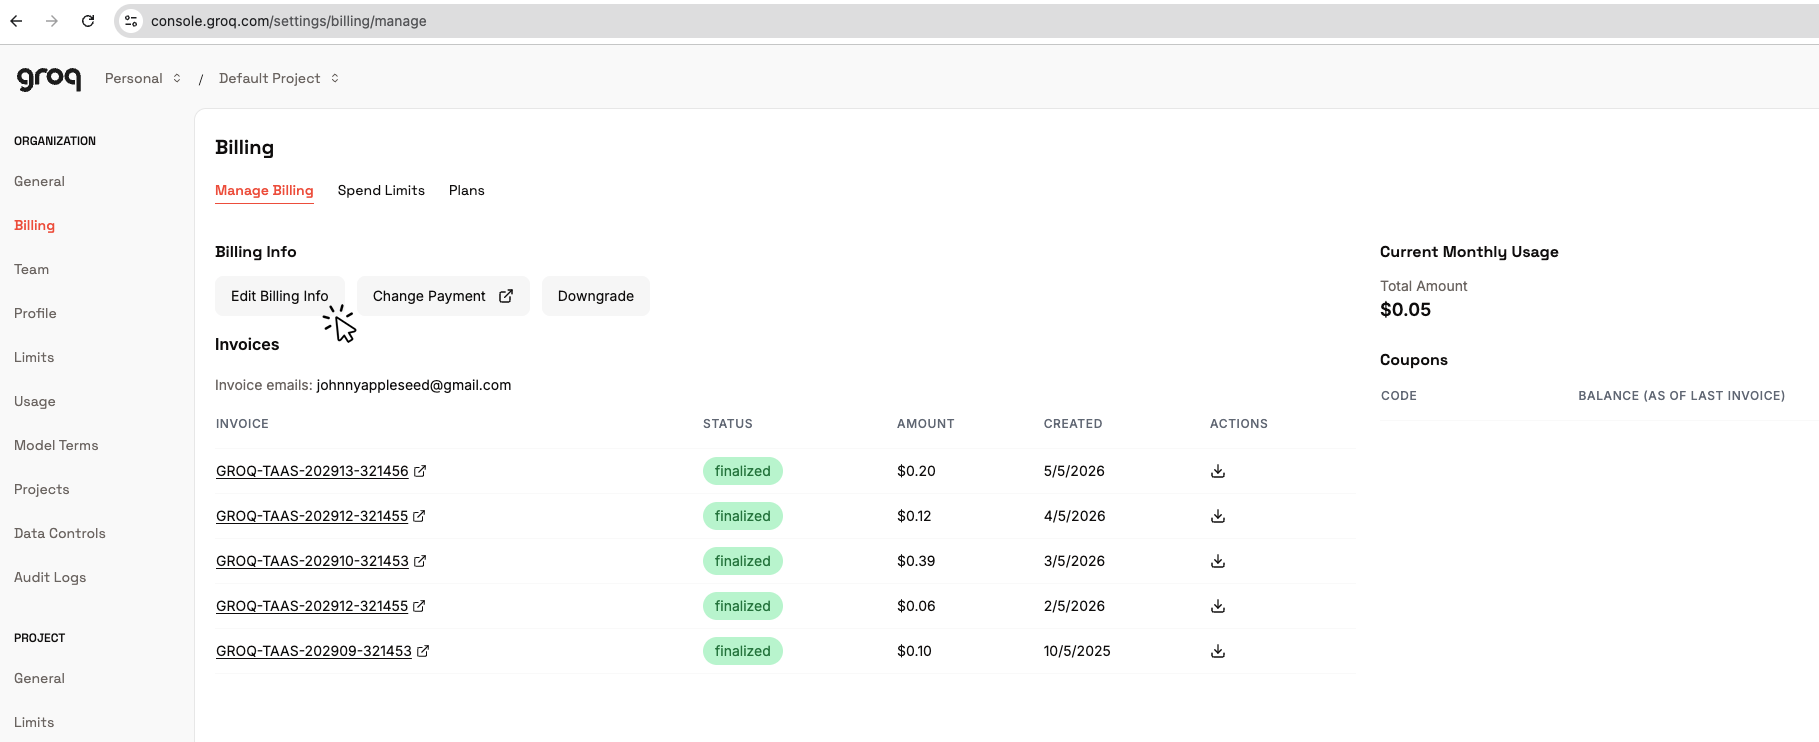
Step 5 — Add a payment method
On the Manage Billing tab, click Edit Billing Info to add your address, then Change Payment to add a card. Groq pay-as-you-go is metered — you'll only be charged for what you use.
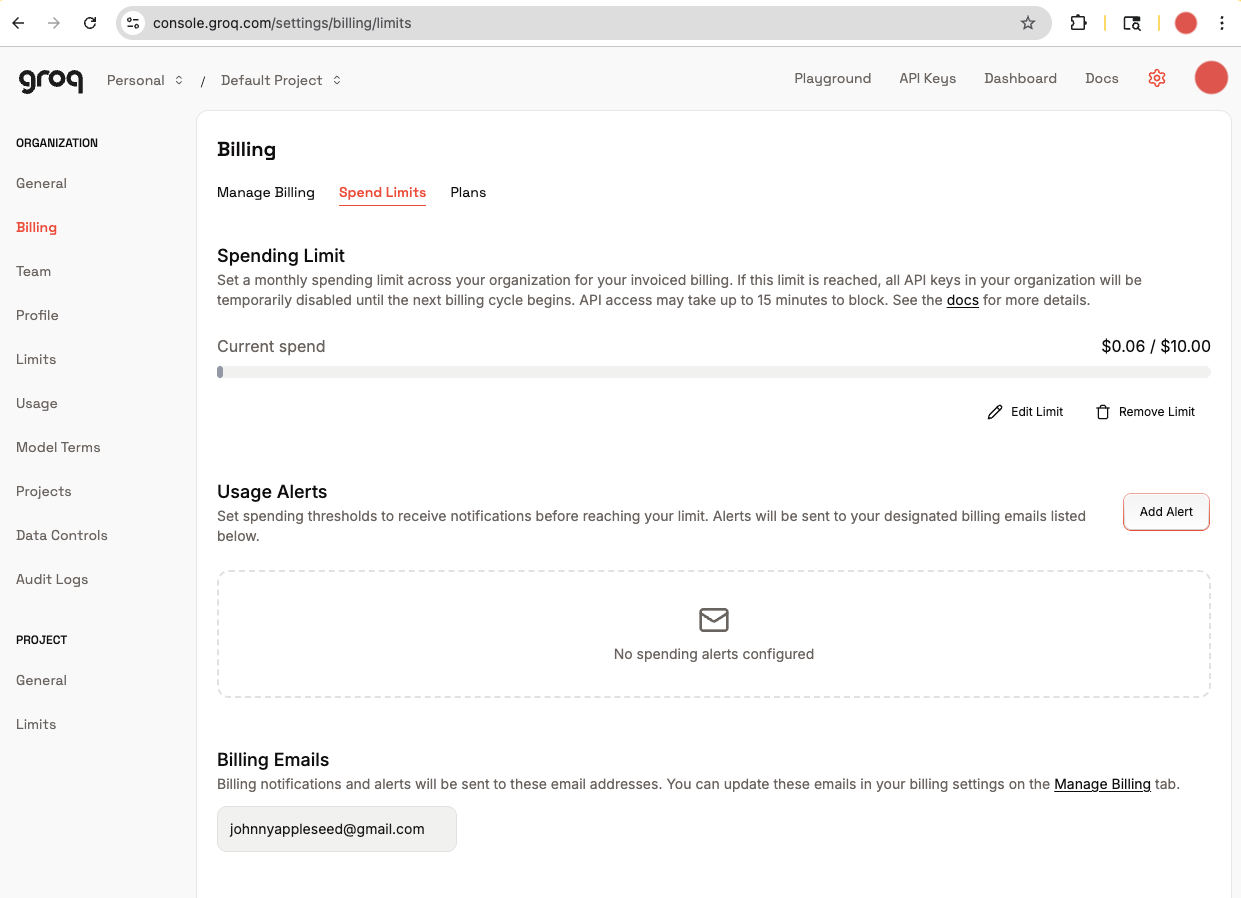
Step 6 — Set a spend limit (recommended)
Switch to the Spend Limits tab and set a monthly cap. A starter limit of $5–$10 is plenty for personal Whiskers use, you probably won't spend more than a few cents per month even if you're using it every day. You can also add a usage alert so you get an email before you reach the cap.
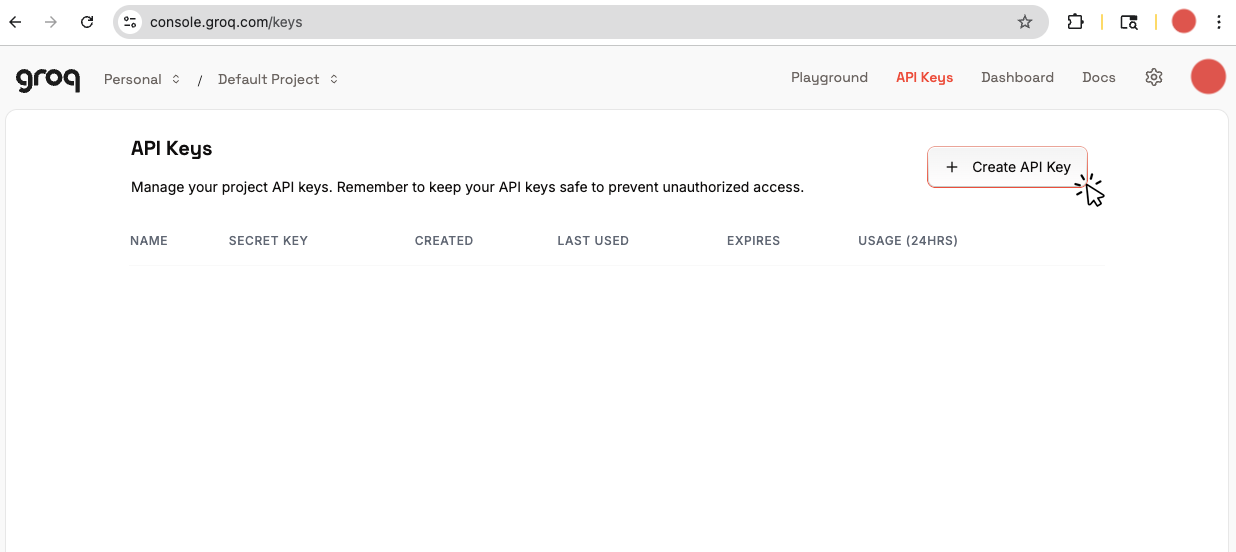
Step 7 — Create an API key
Click API Keys in the top navigation, then + Create API Key in the top-right.
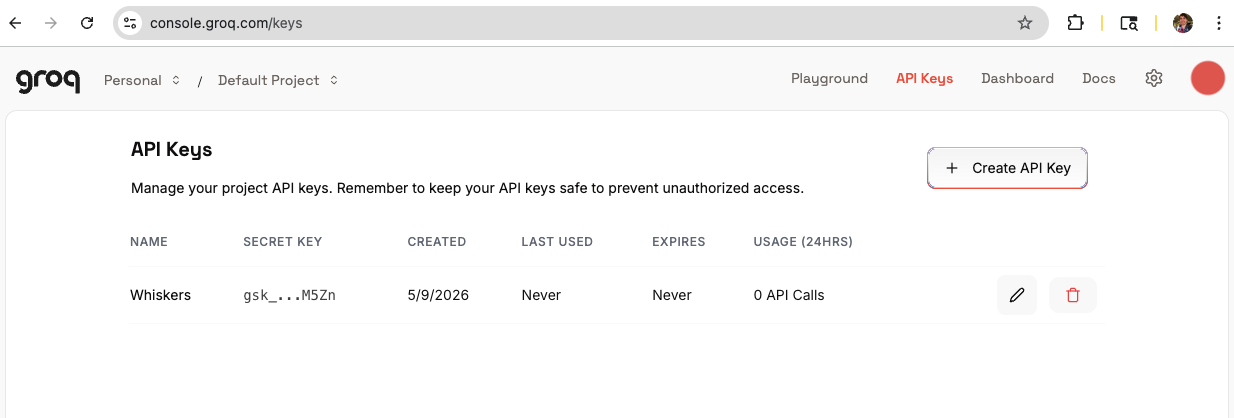
Step 8 — Name it "Whiskers"
In the dialog, set the Display Name to Whiskers so you can recognize it later. Leave Expiration as No expiration (or pick a date if you'd rather rotate it manually). Click Submit.

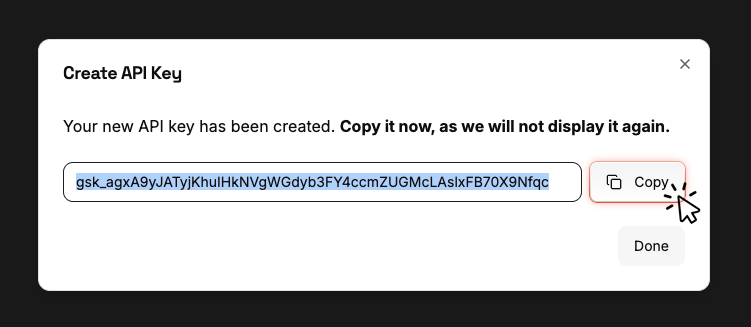
Step 9 — Copy your key right now
⚠️ Copy the key before closing this dialog. Groq only shows it once. If you lose it, you'll have to delete the key and create a new one.
Click Copy, then paste the key somewhere safe (a password manager is ideal).
Step 10 — You're done
You'll see your new Whiskers key in the API Keys list. Open Whiskers, go to its settings, and paste the key in.
Troubleshooting
I forgot to copy the key. No problem — delete it from the API Keys list and run through Step 7 again.
The key isn't working in Whiskers. Double-check that:
- You pasted the entire key (it starts with
gsk_). - Billing is set up (Step 5) — keys won't authorize without it.
- You haven't hit your spend limit (Step 6).
I want to rotate or revoke the key. Go back to API Keys, click the trash icon on the row, and create a new one.